In one of my previous blogs, I explained how to create a free blog using WordPress and how to choose the right theme for your WordPress.com blog. Today, I will take you through the steps to customize your WordPress.com blog.
Steps To Customize WordPress.com Blog
Once you have chosen your theme and installed it on your site, you can simply hover over My Site -> Customize, the button next to Themes on your Dashboard. (Screenshot below)

Once you click this button, customizer (like below) will open.
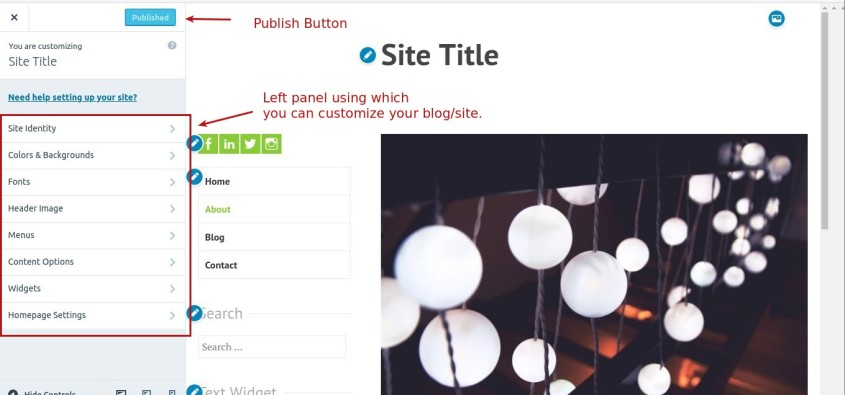
Using the options given in the left panel, you can easily customize your WordPress.com blog. The changes that you do using customizer reflects on the right preview screen. To make this preview live, you have to hit ‘publish’ button given on the top of the left panel i.e. the customizer, once you are done with the changes. (See the screenshot below)
Now let’s take them one at a time.
NOTE: Please remember that some themes may not have the options that I have explained in this blog. In fact, some may even have additional options to customize the theme. These options vary based on the theme design.
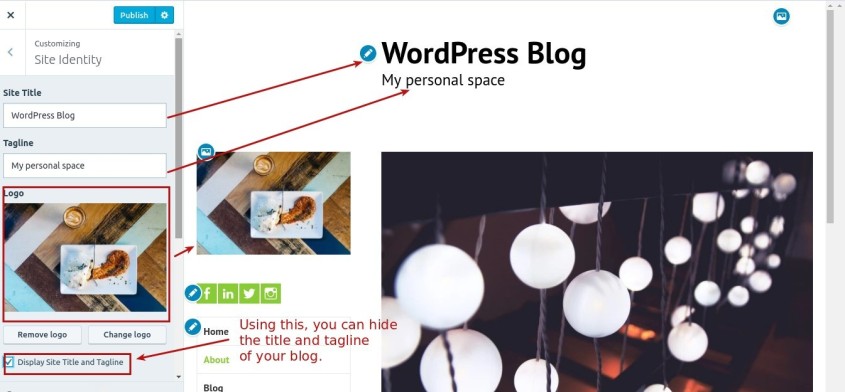
Site Identity
As the below screenshot shows, using site identity you can edit the title and tagline of your site. This section also provides you an option to upload your business/blog logo (I have uploaded a random picture to show how it appears). You can also hide the site title and tagline by simply unticking the checkbox given.
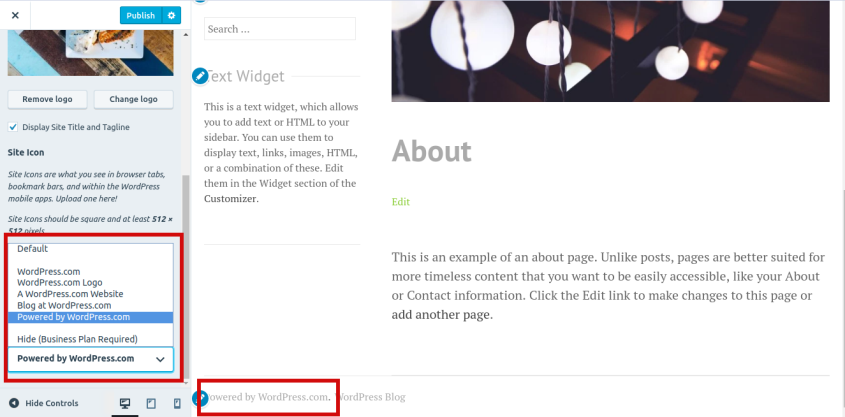
Using Site Identity, you can also add site icon. It appears in browser tabs, bookmark bars, and within WordPress.com app. (Screenshot below)

Moreover, WordPress.com blogs always have footer credit (although you can hide it if you have WordPress.com Business plan). You can choose any text from the footer credit drop-down, given in Site Identity. (Screenshot below)
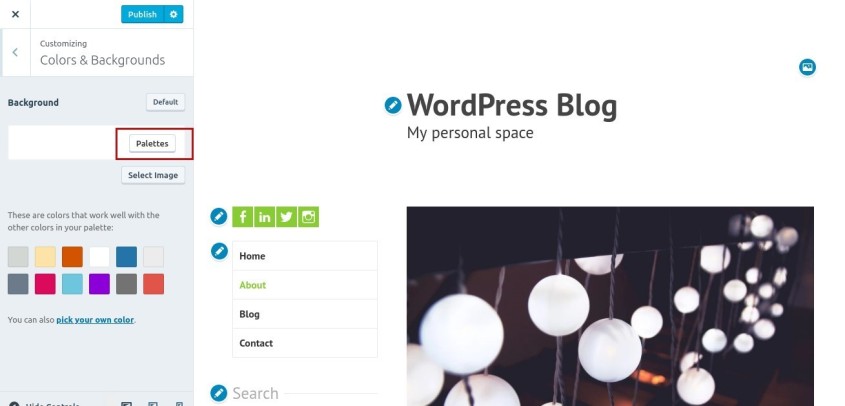
Colors & Background
Using Colors & Background, you can change the background color. You can choose these colors from the Palettes.
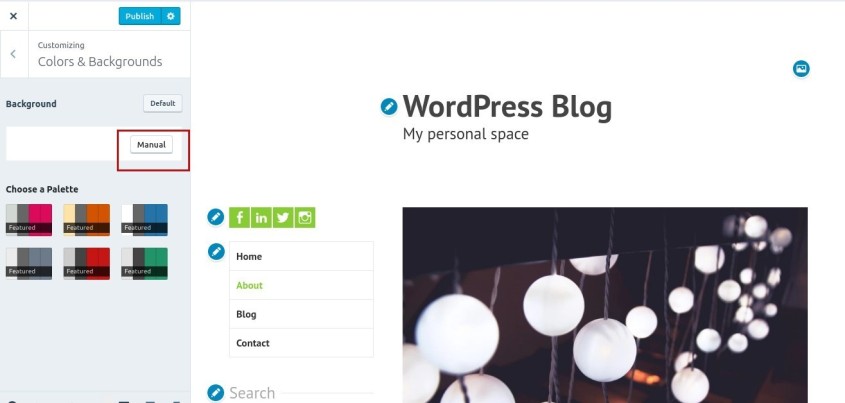
You can also use the ‘Manual’ button to choose the solid background color.
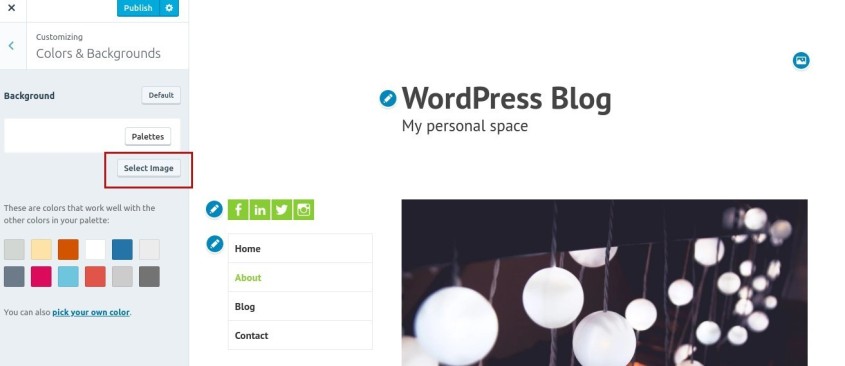
Moreover, you can place an image in the background of your blog using ‘Select image’ button.
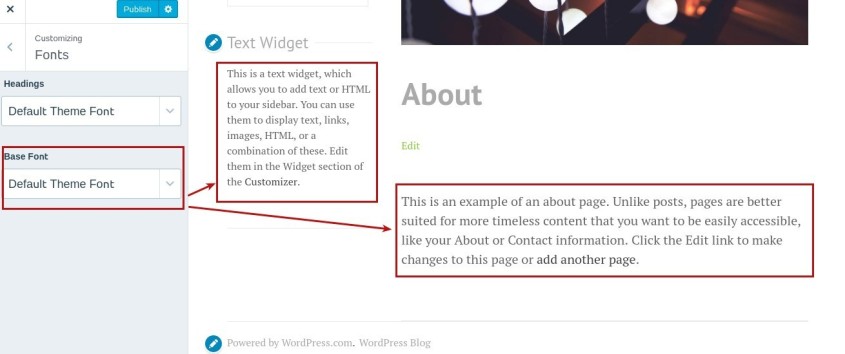
Fonts
Using the fonts section in the customizer, you can change the font theme of headings and base content.

Header Image
Using ‘Header Image’, you can change the picture appearing in the header of the theme. You can choose either from the suggested pictures or you can upload your own.

Menus
Menus are further divided into Primary menu and Secondary Menu. The number of menus can increase/decrease depending on the theme design. (See Screenshot below)
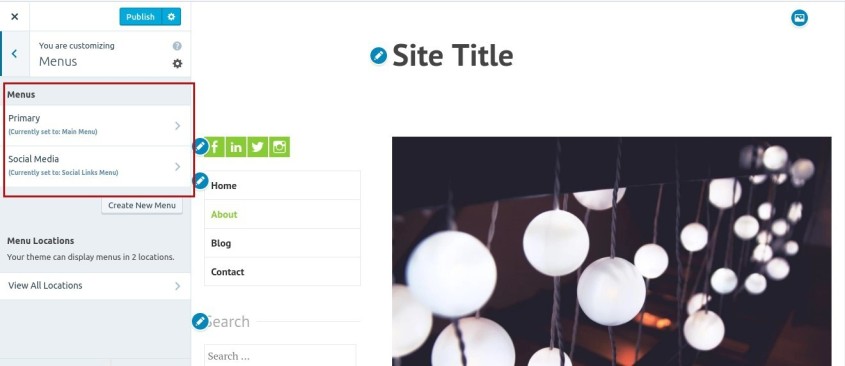
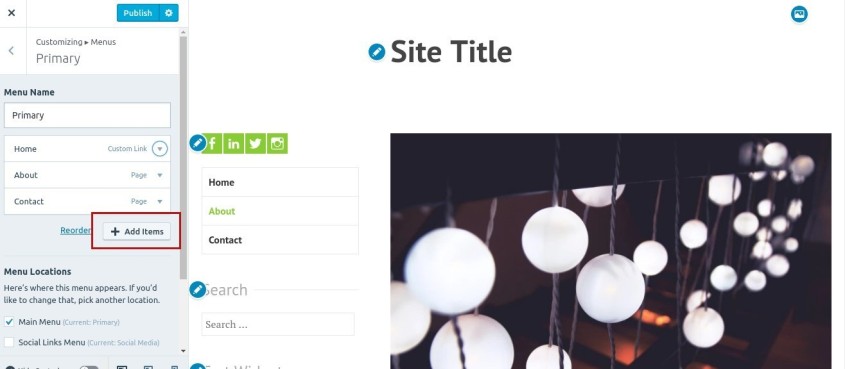
Primary Menu
When you click the primary menu, you will see all the menu items that you placed in the primary menu. For example, in the below site I added three menu items in the primary menu viz., Home, About, and Contact. You can add more menu items using the ‘Add Items’ button. (See below)
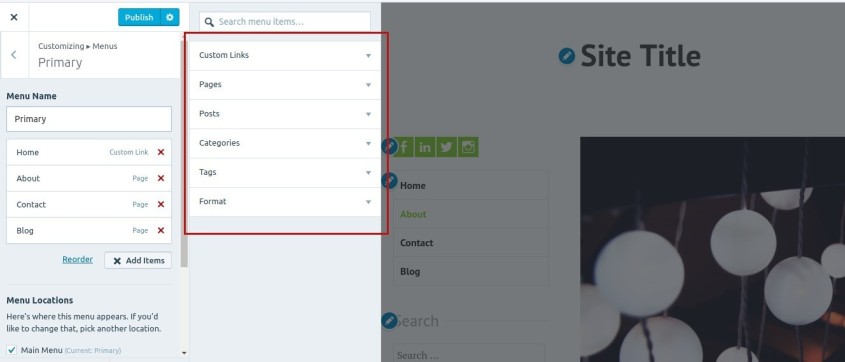
When you click ‘Add Items’ button, you will see different options like Custom Links, Pages, Posts, Categories, Tags, Format etc.
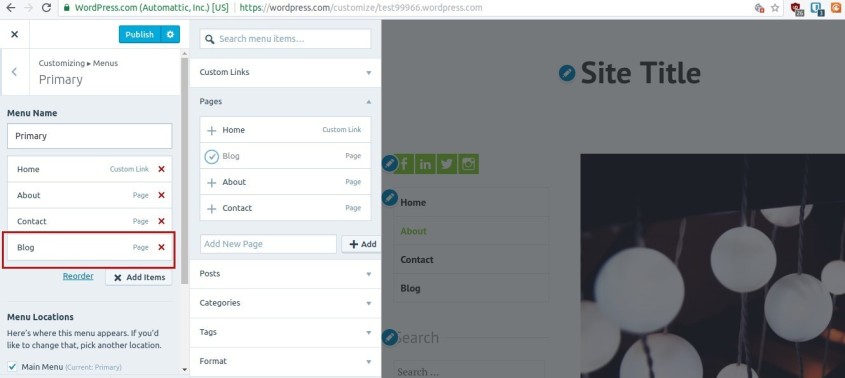
By clicking ‘Add Items’ button you will see the expanded version of pages, by default. Here you will see the different pages you added to your editor. So, if you want to add any of the pages in the primary menu, you just have to click the ‘plus’ (+) sign given next to that page and it will be added in the primary menu (like below).
Similarly, you can add posts, categories, tags, and formats in the primary menu.
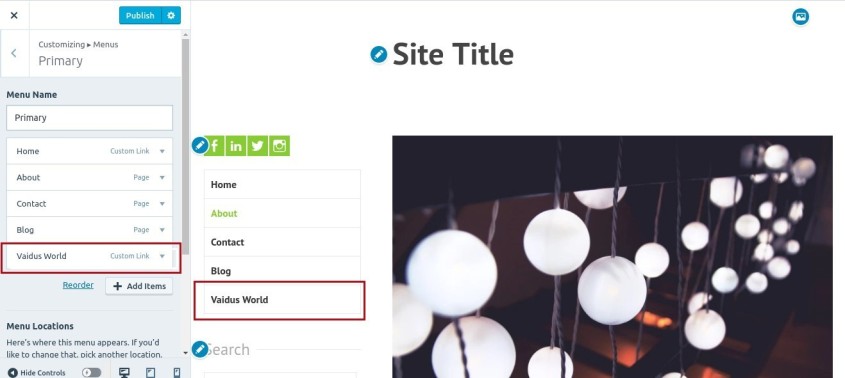
Moreover, you can use custom link to add other links to your menu items. For example, I added my another blog, Vaidus World in the menu item (Screenshot below). I simply added the Link text and URL and clicked the ‘Add to menu button’.

So now, whenever someone will click on Vaidus World given in the menu item, the user will be directed to my another blog.
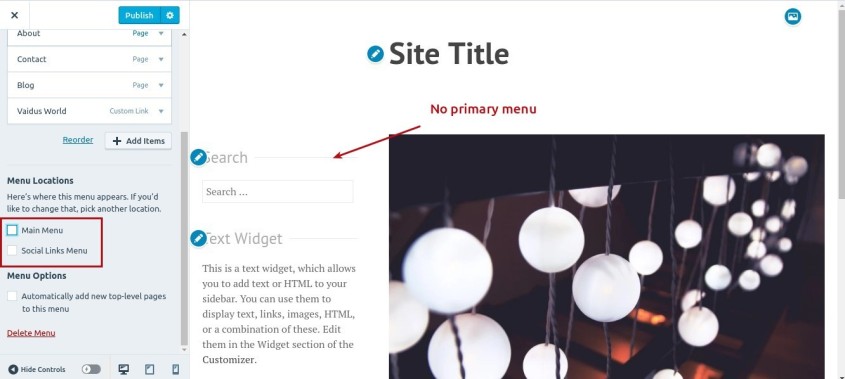
One more important feature that you should not miss to notice is the menu location. Always provide a location to the menu (It can change depending on the theme design). In the below example, I chose Main Menu as the location of primary menu.

However, if I will untick them then the menu will not appear on the site.
Secondary Menu
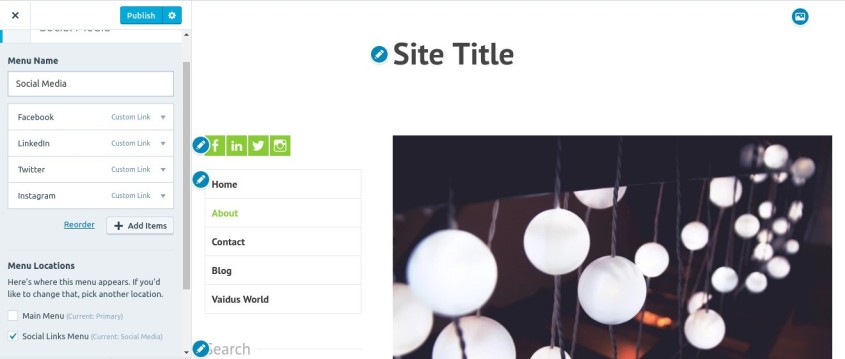
Similar to primary menu, you can edit your secondary menu too. In most of the themes, social media is the default secondary menu while it may differ depending on your theme design. In this menu too, you have to define the menu location. See the below screenshot and consider it as an example of a secondary menu.
For detailed help on the custom menu, see this support document of WordPress.com.
Content Options
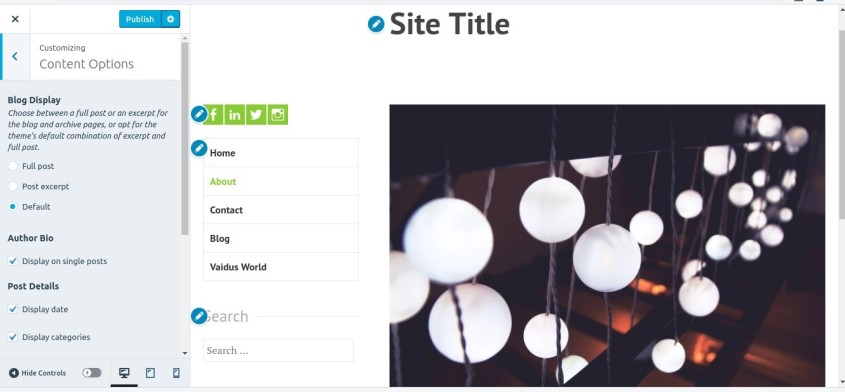
Content Options help in customizing blog display, author bio, post details, and featured images. Using this feature,
- You can decide how your blog should be displayed
- Whether you want to display the author bio in the single post or not
- Can decide if you want to display dates, categories, tags, author etc. in the single post
- You can display featured images in the single posts/pages etc.
Widgets
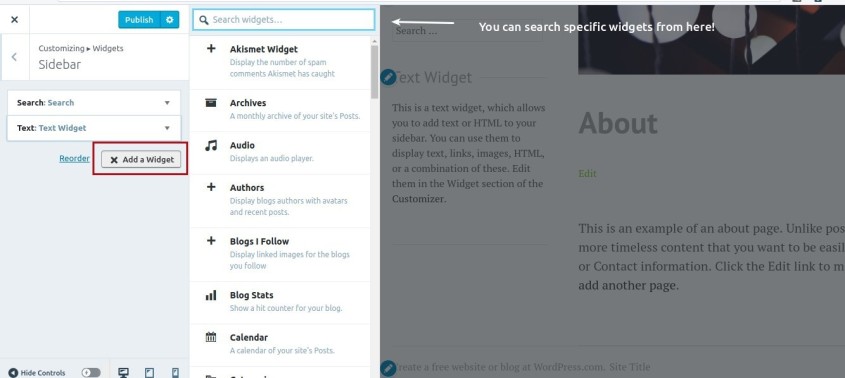
Widgets are very useful. Using widgets, you can add categories, text, author bio, Facebook timelines etc. on the sidebars or footers. However, some themes may offer 2-3 widgets areas while some may offer even single widget area. For example, in the below site there is only 1 widget area, sidebars.
To add a widget you have to click ‘Add A Widget’ button and the list of widgets will appear in front of you and you can choose any of these.
For a detailed understanding of widgets, see its support document here.
Homepage Settings
Using homepage settings, you can define the display of your homepage. You can choose either of the below:
- Latest post
- Static page
If you choose the latest post, your homepage will display your blog posts in the form of a feed/list on your homepage, recent post being on the top of the blog list. (Screenshot below)

On the other hand, if you choose static page option, you can choose a page to be displayed on your homepage as well as post page.

For detailed understanding of Static page, see this support document.
This is it! Isn’t it easy? 🙂
If you have any more questions on how to customize WordPress.com site, please feel free to drop your queries through the comment section below. I’ll be happy to help.
Also, if you have questions specific to your WordPress.com site/blog, please share the URL of your blog too. It will help me solve your queries.
Happy WordPress!

Leave a comment